Thursday, 22 August 2013

LOTV Inspiration Blog cards

Hi there -today I am sharing firstly some cards I made for LOTV that were recently posted on their inspiration blog & can be seen 'for real' in the shop if your lucky enough to live near by! (Sprinfield Centre, Bagley Lane, Farsley, LS28 5LY). They were then feautured on the LOTV inspration blog, which can be seen below. 
 
 I have some exciting news that I recently opened a second blog 'my Pastel Euphora' which is where you can find all of the projects below, materials used & how to make etc. On this blog I'm going to share my more magazine style of cards that I make like this, mostly using Vintage & Shabby Chic stylings in pretty pastles. I'd love some new followers if it sounds like your kind of thing & as always visits & comments are much appreciated! I will also be giving out some 'welcome candy' soon on there for followers of both my blogs so be sure to check back for that ;)
 
Anyway here is the LOTV post...
 
''I thought we’d have a break from Christmas for a couple of days, these are some lovely cards and a little box that were made for us by Deb Hughes using some of our sentiment stamps ...


Deb has used the Vintage Sentiments – Just To Say set and also our Calendars stamps on her lovely cards"
 
Links to products:
 
Thanks for looking.
xxx

Saturday, 17 August 2013

The Rubber Buggy 'Jardin'

Hi all & I'm super excited today to be back posting for my Saturday spot at The Rubber Buggy inspiration blog.
click here
 
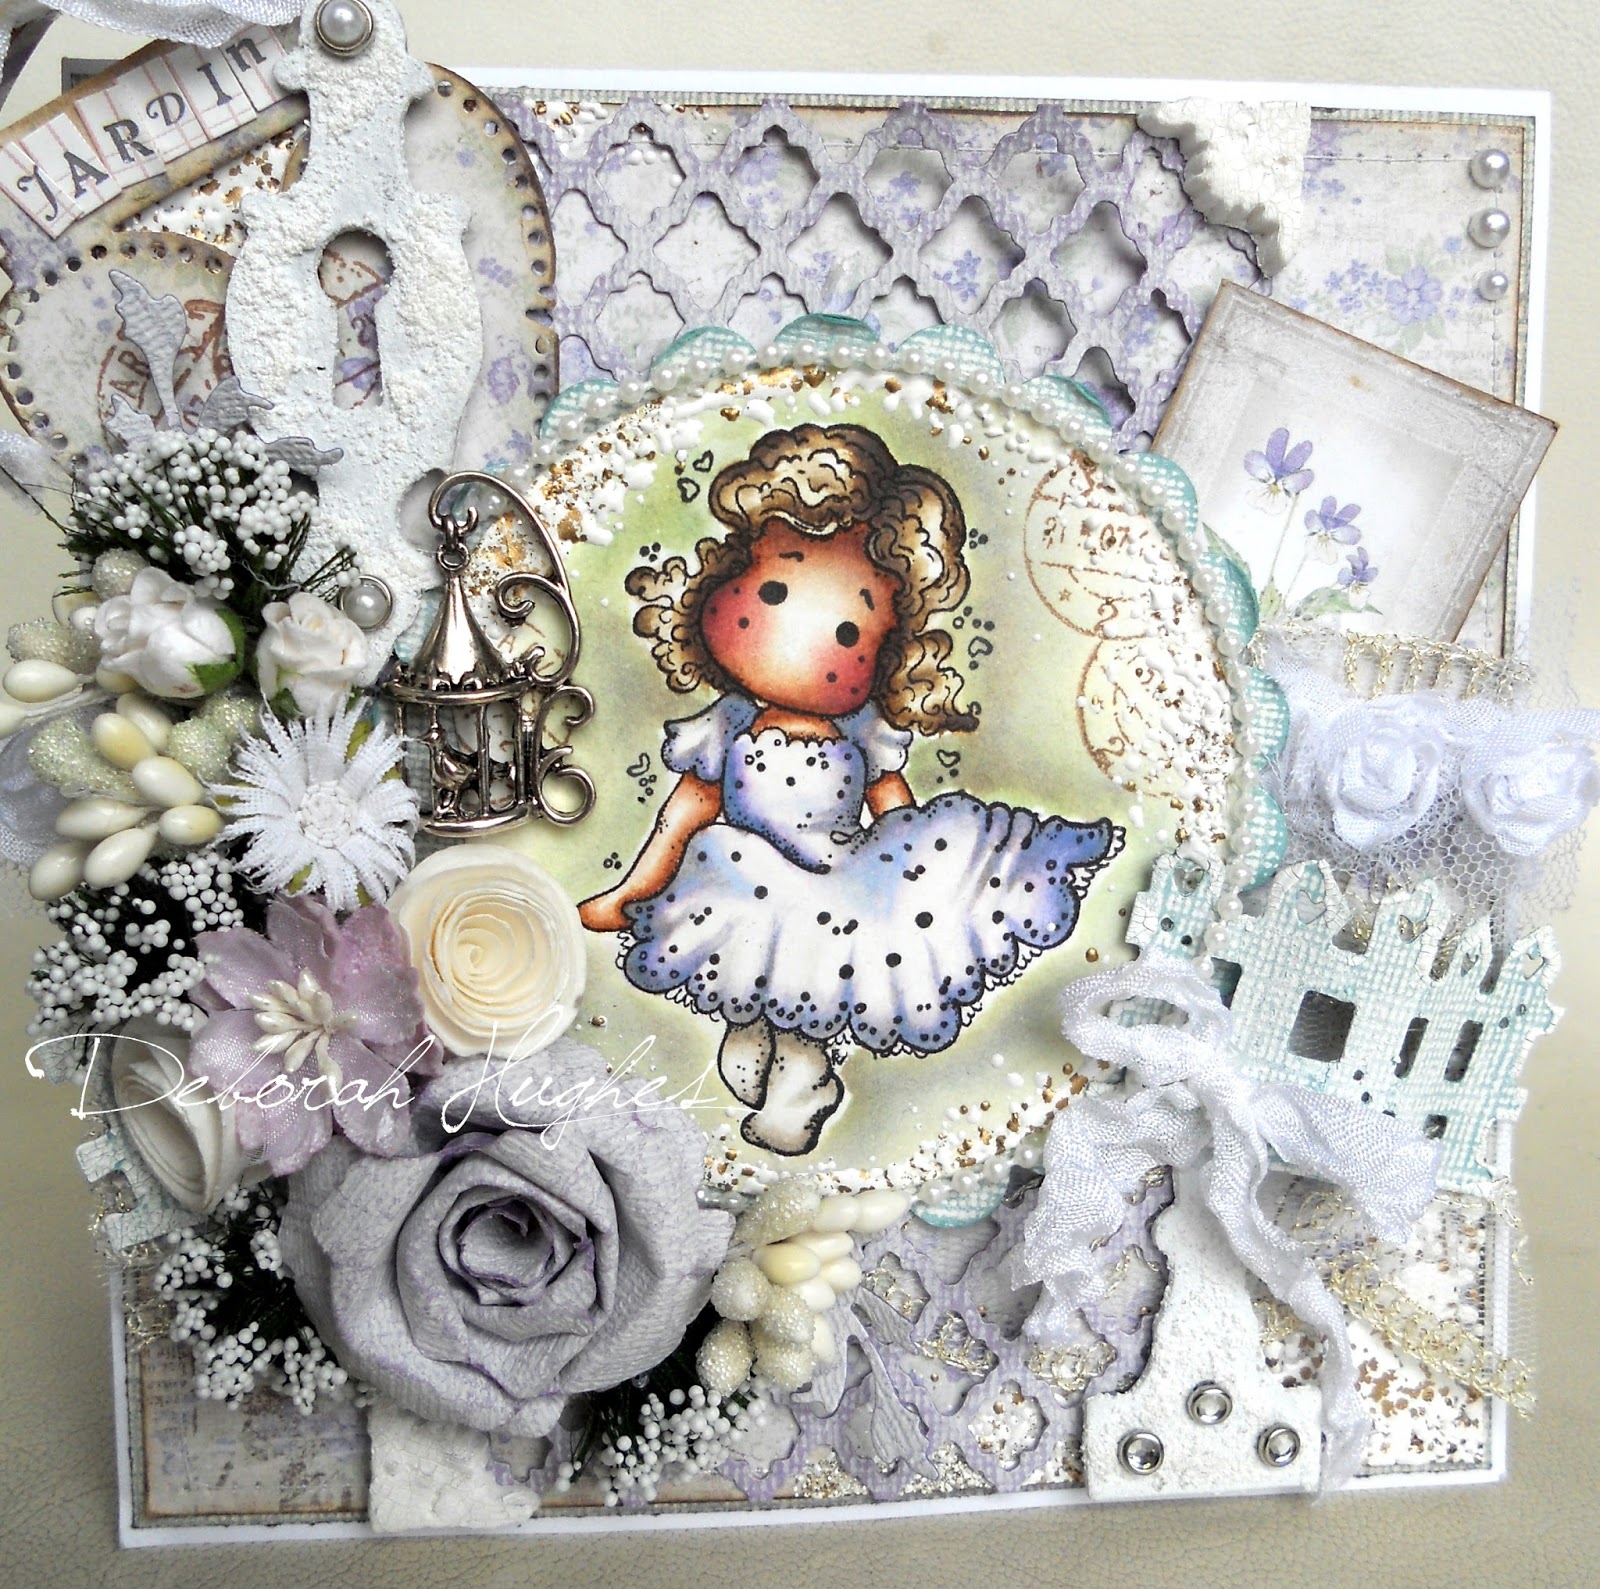
 I've made a Magnolia card using 'Delightful' Tilda who I have to say is my absolute fave Tilda so far - just how much more appealing can these images get?!! I decided on some yummy lilac papers by Maja Design in my favourite shabby chic style, which seems to have given the card a 'Wedding' theme that I wasn't necessarily aiming for to begin with, but I think the lattice and shabby white seam binding have also added to the Weddingy feel.


The lattice effect die is by Spellbinders, cut from Core'dinations Whitewash cardstock. I also cut the Lovely Fence die, Scalloped circle matt & large lilac flower from the same card.
 
 
I coloured with image with Distress Inks - I;ve been trying for ages to get my images to look a little softer & paint in a more shabby chic style that other crafters do so well, but I really struggle to STOP painting in details & adding to the depth of shading (I'm sure that's what most people struggle TO do...trust me to be coopsite!) Anyways even though I don't really think I've managed to do this yet, for my second painted image after over a month break I'm reasonably pleased with. The dress was painted in Shaded Lilac - I LOVE this new colour & it didn't really need anything adding to it to perfectly match the designer papers...but that's why I love DI's so much!
 
 
Distress Inks:
Skin - Tattered Rose, Vintage Photo
Cheeks - Tattered Rose mixed with Aged Mahogony
Hair - Antique Linen, Walnut Stain
Dress - Shaded Lilac
Tights - Pumice Stone
 

Flowers are a mixture of Kort & Godt and Prima. I sprinkled around the image and on some of the paper corners with White Frantage Embossing Powder then added some white pearl bead string. Below I spelled out 'jardin' in mini-alphas on the So Wrapped Doo Hickey die.

 
Above shows the Magnolia Doo Hicket So Lovely die with shabby seam binding bows, Tim Holtz Hardware Findings die cut from grungeboard and covered in Snow Tex & silver bird cage charm available from The Rubber Buggy. Below shows the bottom of the hindge from the Hardware Findings made in same way as lock.
 
 
Suggestions for The Rubber Buggy Products:
 
 
I'd like to enter into the following challenges:
 
Live & Love Crafts - Warm or Cool colour pallete
Marvelous Magnolia - Anything Goes
Totally Tilda - Tilda's Wedding
Magnolia-licious - Lacy Lace
7 Kids College Fund - Anything Goes with Vintage twist
Creative Inspirations - Monochrome
 
xxx


Friday, 16 August 2013

I'm back!!! with The Rubber Buggy challenge 'Back to School'

Hi everyone & fianlly...I am back!!!
As some of you will know I had plans to re-decorate my craft room, and whilst that STILL isn't complete yet, it is now totally re-organised and back in working order. I've done all the fiddly storage items like getting all of my teeny tiny buttons, brads & bits 'n' pieces organised into brand new proper storage boxes (instead of my old cardboard/makeshift ones that were falling apart!) with different compartments so everythings looks neat, tidy & colour coded. So thats the hard part (or certainly the part I least like to do!) I've completely re-arranged the whole room & made little areas for different techniques, like a stamping & colouring table & shelves, a die-cutting storage table, sewing table & organised all of my different sized papers into their collections in plastic sheets. It must be working as I'm whizzing around on my chair much less than I used to as everything I need is right there infront of me!
I just need to re-paint now and get some nicer looking of the larger furnature/storage items as & when finances allow. But on the whole the room works so much better, plus it's just taken me half the time to complete one of my SC&P commissions than it usually would - just beacuse everythings tidyed and all my tools are to hand. Wow - such a pleasure to be crafting again - I should have done this years ago!!!
I'll take some pics when the cosmetic parts all done ;)
 
Anyhow enough of my rambligs I'm posting today for The Rubber Buggy who I just like to thank for being so patient with me whilst all of this has been goin on, so please join me in supporting this great, fun 'Back to School' theme!

 
The suggested colours for the Back to School theme were red, yellow & black...well whilst these colours are perfect for back to school theme - I just don't do primary colours!! So I used these scrummy Vintage Garden papers by Pion Design which have a redish, yellowish colours but in a softer, more shabby pallet that suits me down to the ground! I then added some heavy dark metal objects & black stamping for a hint of black. I used 'Tilda with Spitz Pocket' from the Special Moments collection 2013.
 
 
Distress Inks:
Skin - Tattered Rose, Vintage Photo
Cheeks - Tattered Rose mixed with Aged Mahogony
Hair - Antique Linen, Walnut Stain
Dress & Shoes - Victorian Velvet, Pumice Stone shading
Socks, Pocket & Dress lace trim - Pumice Stone


Embellishments include Martha Stewart clay frame & corner, Dymo red tape sentiment distressed with white paint, Tim Holtz hindge die covered in Crackle Paint, silver owl charm, shabby seam binding bows, lace & button tied with twine, doily & Tim Holtz metal file tabs & bull dog clips. The flowers are WOC & Magnolia berries both available from The Rubber Buggy (see below for links to products used).

Links for Rubber Buggy Products:
Tilda with Spitz Pocket
Tim Holtz Distress Inks
Magnolia Doo Hickey Dies
WOC Flowers
Other flowers & Berrries
Lace & Trims
Metal charms
Buttons
Doilies

I'd like to enter into the following challenges:
Dutch Magnolia Chickies - Anything Goes
Lovely hAngler or Sweet Magnolia - Buttons or Bows
Magnolia Mania - BINGO (middle row - Tilda, pink, stitching)
Magnolia-licious - Lacy Lace
Stamp & Create with Magnolia - Back to School
 

Tuesday, 9 July 2013

BARGAIN MAGNOLIA CARDS!!!

Hey Guys,
Take at look at my last 3 Etsy cards - they only have a short time left & I've decided to reduce them, so why not grab yourself a bargain!!!


All priced at just £7.00
(previous listing price £10.00)


Friday, 5 July 2013

Hope to be back soon!!!

Hey guys

Just a quick note to let everyone know why I haven't been posting for the past couple of weeks. As some of you will allready know I had a major disaster in my craft room which is in my loft space a few weeks back when I found signs of mice....yes MICE!!! Oh my word I was not a happy bunny & on investigation I found a small litter bag that had got mixed up with some bags of old childrens clothes that had a few bits of toast crust in (how embarrassing!!!) They had chewed through the bottom of the plastic bag & even nawed at some bits of papers I had in another bag. Luckily my loft is in 2 sections & my craft room was completely untouched as were the bags of clothes, however I immediately boxed all my craft stuff up & got it to safety downstairs! So after emptying the loft completey which to be honest really needed doing anyway, we were able to deal with the mice & they have now completely gone...Yey!!!

I've wanted to spruce up my craft room for ages now - it's a lovely big space but my storage is ugly looking & the whole thing is just very dreary & un-inspiring, when I see pics of other peoples beautiful looking craft rooms I'm so jealous! So even though I can't afford to do exactly what I would like at the mo as we're not working as much as we'd like, I decided to take the opportunity to completely re-organise everything, get some new bits & pieces & generally try to make it look at bit prettier! So I've signed down off all my design teams (very sadly!) apart from The Rubber Buggy who I've only just joined and I'm hoping to be back up & running over the next week or 2.

Thanks for visiting & hope to have some new yummy projects to share v.soon!

Hugs,

Deb.x


MY MAGNOLIA SLIDESHOW

LinkWithin

Related Posts Plugin for WordPress, Blogger...