Firstly major appologies for being late with my posts. As you may know I've been having major technical problems due to my laptop being down through to having viruses on. After being without it for nearly 2 weeks its such a blessing to have it back! Thankyou for bearing with me & after a bit of catching up -everything should be back to normal very soon!
Theres a great challenge over at Card-makin Mamas this fortnight which is With a child/ For a child. So I thought I'd utilise my daughter & her creatice skills! We often draw & paint together & do other child related craft stuff, but I don't usually do cards with her & shes learning not to touch Mummys stuff. Actually shes now scared half to death after me freaking out a few times when shes got a hold of different things, so when we came to make these together she was reluctant to touch my stuff & kept saying 'But Mummy I can't use that because thats Mummy special card stuff!' which made me feel extreemly guilty as I never realise how hard I'd drummed it into her! (BAD MUMMY! haha) So make sure you grab the opportunity to get your little ones involved & be sure to head on over to the challenge blog for inspiration & to proudly share & display your childs efforts here.
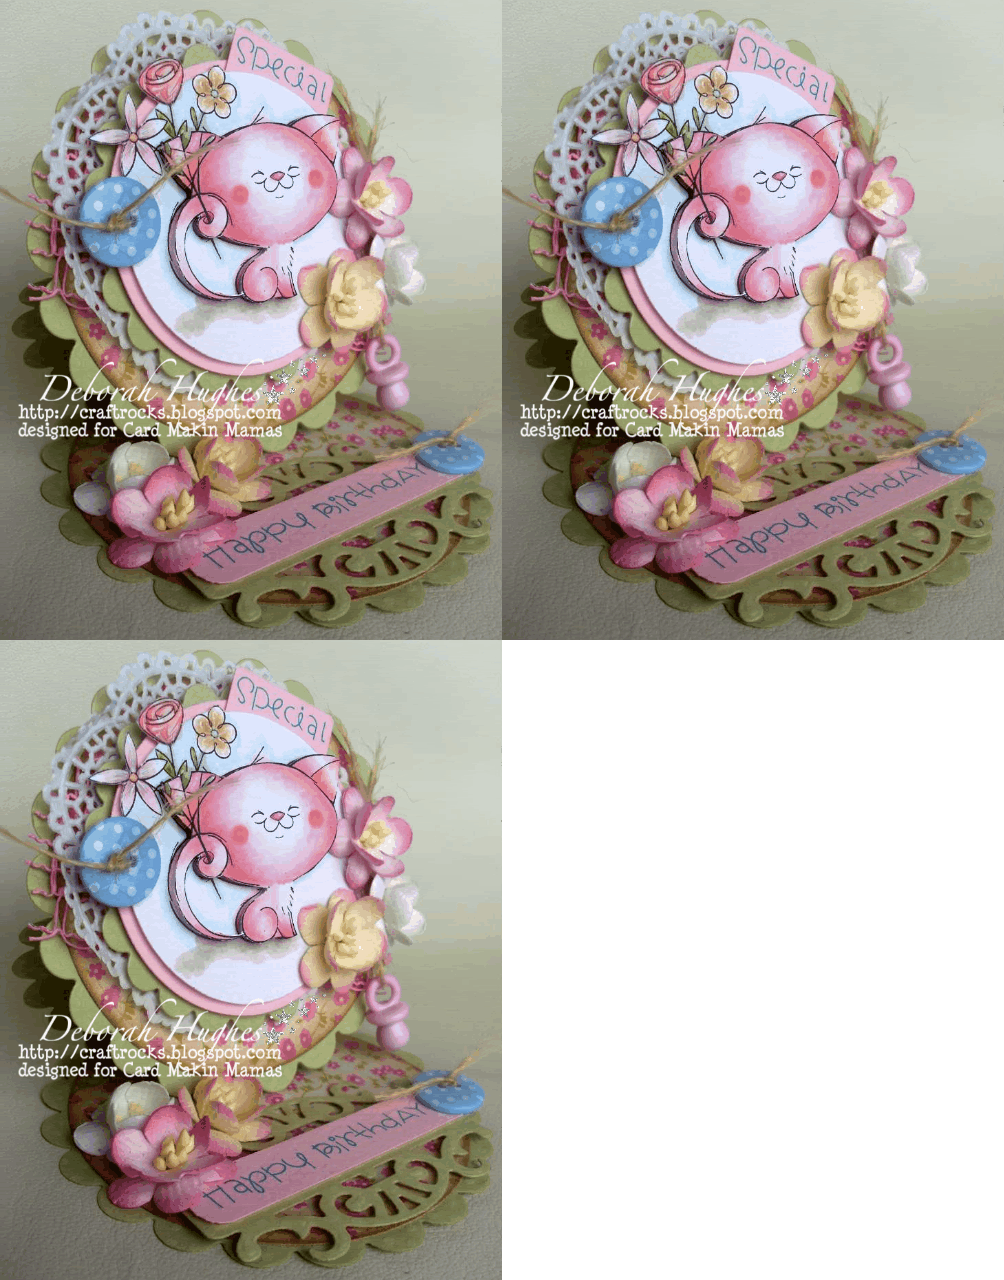
Anyhow heres my attempt using the fab 'Thankyou Cat' image. I'm always at it with the easel cards, but usually do 6x6 square ones & have been meaning to do a smaller shaped one for ages. When I saw this image I thought it'd be perfect for it!
COPICS:
Cat: R000, R20, R81, RV34
Cheeks & ears: R00, R20
Nose: R81
Stems & Leaves: G000, G21, YG03
Left flower: V000, V12
Middle flower: R00, R20
Right flowerYR000, YR20
Flowers from Wild Orchid Crafts. Cute polka dot baby blue buttons tied with twine & pink 'dummy' button which hangs with twine from under the flowers are from my local market. Doily & pink lace has been added behind the image.
'Happy Birthday' & 'Special' sentiment wrote with Doodlebug Design rub-on alphabet letters on pink card-stock tabs. Fancy tag on base is Spellbinders Fancy Tags 3 set.
EASEL TUTORIAL:
You will need Spellbinders Nestabilities Circles & Scalloped Circle dies.
1) Score & fold a piece of card-stock approx 4" square
2) Using the largest of the Scalloped Circle dies, position with a slight clearance over the fold & run through the die cutter - You should now have a normal Scalloped Circle card-blank.
3) Score one side of the cardblank parrallel to the center fold approx half way (so the fold runs through the center of the circle)
4) Now fold this so when the base of the card is on the surface the top folds back down towards the base.
5) Cut another scalloped circle & line up the scallops, adhere to just the outer half only so the top of the circle stands alone & the fold acts as a hindge.
6) You can now add the patterned paper cut with the largest Cirlcle die, & decorate as desired.
And now onto my beautiful baby girls card who has done the vast majority of the work herself & done a fantastic job with the colouring. She did the flowers including the tiny leaves & petals all by herself & the cats feet & actually blew me away with the control she has over the pencils. I should probably mention she is only 3 (well 4 next week!) but even for a 4 year old I'm sure you'll agree thats pretty good going!


I've told her I'm posting hers too - but don't think she really understsands, so when she sees it she'll be well chuffed! Shes amazed when she sees a card I've made that she recognises on the computer & gets really excited saying 'Mummy thats yours' & 'Why have they got your cards Mummy?' Oh the joy! - they're just great arn't they? I think we could learn a lot from their attitude & way of thinking sometimes! haha. So to my baby girl - love you princess & hope you like your post, this ones all for you! mwwaaaahhh!!! xxxxxxx
I'd like to enter my card into the following challenges:


No comments:
Post a Comment
Thanks for your thoughts, they are truly appreciated!
Deb.x